Basement Waterproofing Before Remodeling: Moisture Control RulesFinishing a basement is an exciting home improvement project that converts dark, underutilized space into a luxurious living area. However, the golden rule of subterranean remodeling is simple: never build over an unmanaged moisture issue.South Jersey—including Camden, Burlington, and Gloucester Counties—features high water tables, clay-rich soils, and frequent coastal weather events. Pouring thousands of dollars into custom cabinetry, plush carpeting, and new drywall without first addressing basement moisture is a recipe for financial disaster.
Water and vapor will inevitably breach unsealed walls, destroying wood framing, warping flooring, and breeding toxic mold hidden behind your new walls.At Subterra Basement Remodelers, we emphasize that lasting basement finishing requires distinguishing between true exterior waterproofing and interior water management. Here is a technical breakdown of how to prepare your basement substrate for a dry, healthy remodel.Distinguishing Waterproofing from Water ManagementTo design an effective pre-remodel strategy, homeowners must understand the physical forces acting on subterranean concrete walls.Exterior WaterproofingTrue waterproofing stops liquid water from ever touching the outside of the foundation wall.
Subterra Basement Remodelers — official website.
EPA: Lead-Safe Renovation, Repair and Painting.
It involves excavating the dirt around your home down to the footings, applying an elastomeric rubberized membrane to the exterior wall, installing rigid drainage board, and laying an exterior perforated pipe surrounded by gravel. While highly effective, full exterior excavation around an established home is expensive and disruptive to landscaping and hardscaping.Interior Water ManagementBecause exterior excavation isn’t always practical, most finished basements rely on high-performance interior water management.Concrete foundation walls are naturally porous.
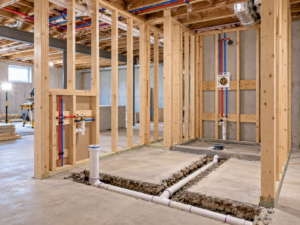
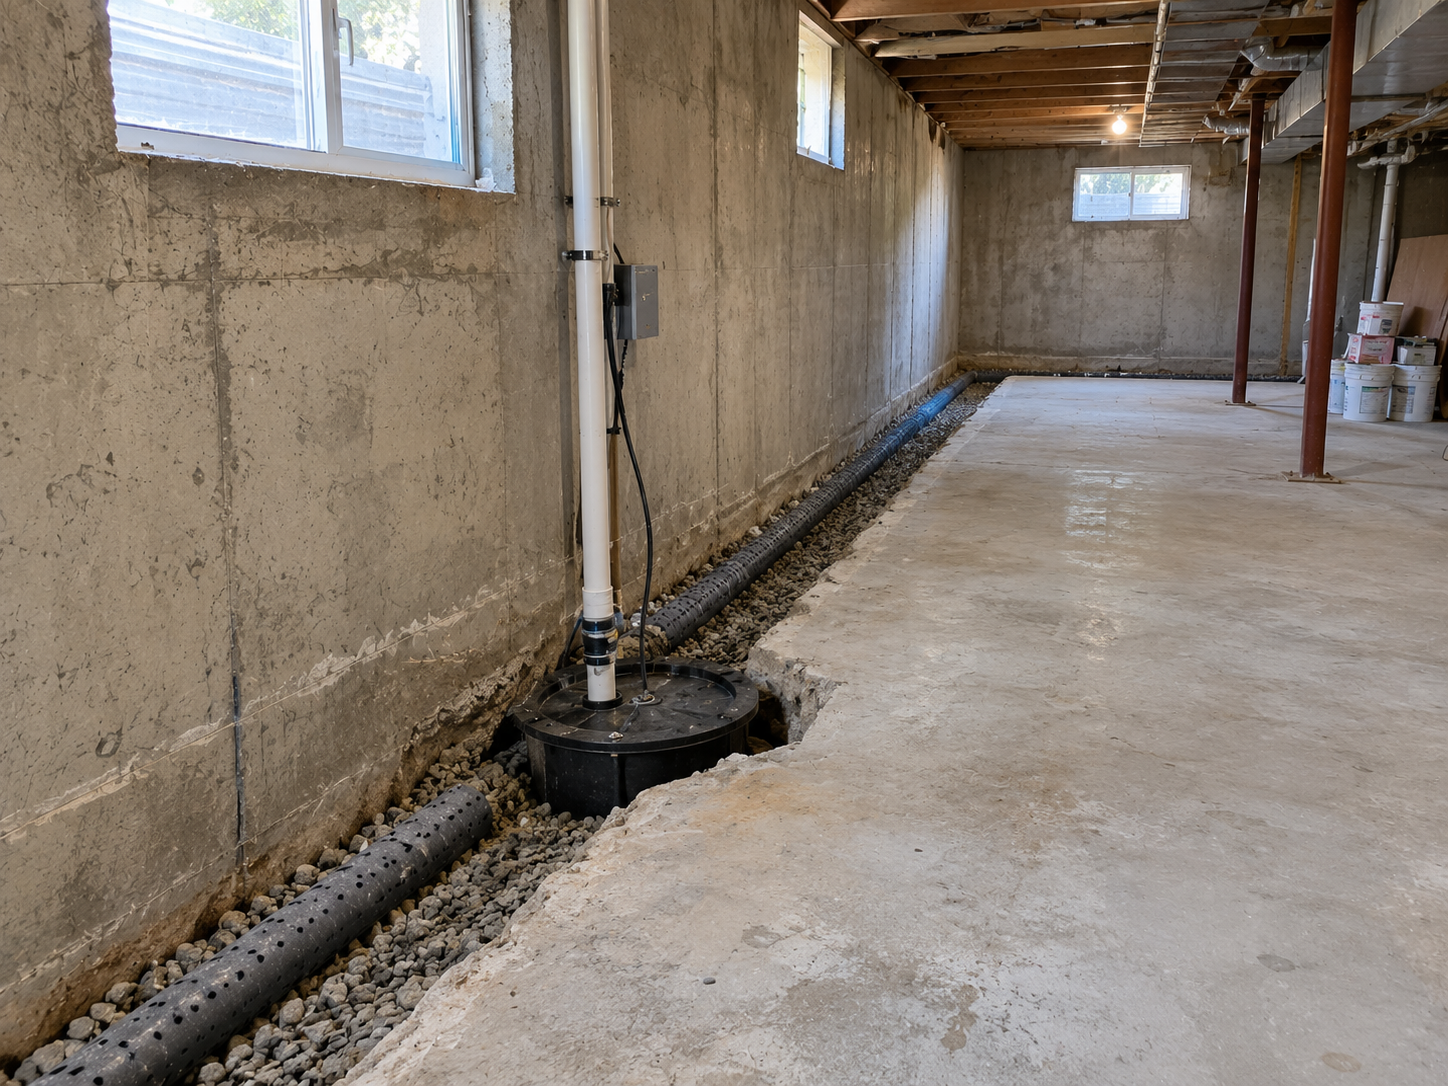
Hydro-static pressure—the weight of water in saturated soil pushing against the outside of your foundation—forces moisture through microscopic pores, mortar joints, and hairline cracks in the wall.An interior water management system accepts that hydrostatic pressure occurs, captures the intruding water beneath the floor slab before it touches your living area, and safely pumps it away from the home.The Components of a Pre-Remodel Drainage SystemBefore a single metal stud is anchored to the concrete, a comprehensive interior water management system should be installed if the basement shows any history of dampness or seepage.Interior French Drain (Perimeter Drain Tile): Contractors jackhammer a 12-inch trench in the concrete floor along the entire inside perimeter of the foundation walls.
A perforated drain pipe wrapped in filter fabric is laid next to the concrete footing and embedded in washed river stone.Dimpled Drainage Board (Vapor Barrier Track): A heavy-duty, dimpled plastic membrane is attached to the bottom section of the masonry wall, extending down into the perimeter trench. If water seeps through a wall crack, it runs harmlessly down behind the membrane into the French drain pipe.Sump Pump System: The perimeter pipe slopes toward a sealed sump basin set into the basement floor. Inside sits a heavy-duty submersible sump pump.
When water enters the basin, a float switch activates the pump, forcing the water up a discharge pipe and dumping it safely away from the home’s exterior foundation.Battery Backup System: South Jersey summer storms that cause heavy groundwater rises frequently knock out power.
A dual-pump setup equipped with a heavy-duty battery backup system guarantees your finished basement remains protected even during a blackout.Managing Moisture Vapor (Relative Humidity)Liquid water leaks are easy to see, but moisture vapor is the silent killer of finished basements.Even if water isn’t actively pooling on your floor, moisture vapor continuously migrates through concrete via capillary action.
If you place wood framing, fiberglass insulation, and drywall directly against damp concrete, that trapped vapor causes relative humidity behind the wall to spike above 70%—the exact threshold where Aspergillus and Penicillium mold thrive.The Correct Vapor Barrier and Insulation SandwichTo manage vapor during a basement finish:Do NOT Use Clear Polyethylene Plastic Sheet: Stapling plastic sheeting directly behind drywall over wood studs traps moisture inside the wall cavity, rotting the studs.Use Closed-Cell Rigid Foam Insulation: Extruded Polystyrene (XPS) or Polyisocyanurate rigid foam boards should be glued directly to the concrete foundation walls, with all seams sealed with specialized vapor-barrier tape.This creates a continuous thermal break and vapor retarder.
The cold concrete wall is physically isolated from the warm, humid indoor air, preventing condensation from ever forming behind your finished drywall.Evaluating Foundation IntegrityBefore framing begins, the structural foundation itself must be inspected for physical defects:Efflorescence: White, powdery mineral deposits on raw concrete walls indicate that moisture is evaporating through the wall and leaving salt behind.
This wall must be sealed and dried before framing.Vertical Hairline Cracks: Settling cracks in poured concrete walls should be injected with high-pressure polyurethane or epoxy foam from the inside to permanently seal them against water intrusion.Horizontal or Bowing Cracks: Horizontal cracks in cinder block or concrete walls indicate severe lateral soil pressure. A bowing wall must be structurally stabilized—using carbon fiber reinforcement straps or steel I-beams—before any cosmetic finishing work begins.
FAQs About Basement Waterproofing Before RemodelingCan I just use waterproof paint (like DRYLOK)
before framing?Waterproof paints applied to interior masonry are temporary coatings. They can resist mild dampness, but they cannot withstand true hydrostatic pressure pushing from the outside. Over time, hydrostatic pressure will push the paint off the wall in bubbles and flakes. It is not a substitute for a true drainage system.How do I test my basement for hidden moisture vapor?A simple test is to duct-tape a 2×2-foot square of clear plastic wrap flat onto your bare concrete floor or wall. Leave it sealed for 48 hours.
If condensation forms on the underside of the plastic, you have significant vapor migration that must be addressed with rigid foam insulation or specialized floor sub-panel underlayments.Do I need a dehumidifier in a finished basement?Yes. Even with a perfect waterproofing system, basements are subterranean, naturally cooler spaces where relative humidity runs higher than above-grade floors. Installing a dedicated, high-capacity, self-draining dehumidifier is essential to maintain indoor humidity below 50% and keep the space smelling fresh.Don’t gamble with your remodeling investment.
Partner with Subterra Basement Remodelers to engineer a dry, healthy, moisture-controlled foundation before creating your dream living area.